This week we made Velvet Pumpkins. Here is the supply list and DIY instructions.
Supply List...
Velvet
Scissors
Something to mark fabric with
Hot Glue and Hot Glue Gun
Small Sticks or Driftwood
Embroidery Thread
Embroidery Needle
Beans or rice
Poly-fil
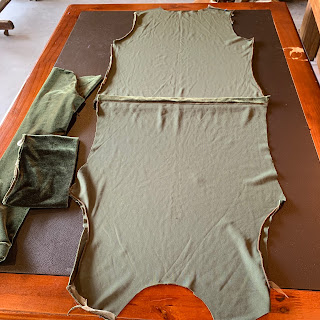
First you will need some velvet. You could go out and buy velvet at the fabric store but that can be very expensive. Rachel and I made a Goodwill run and found some old velvet shirts in several different colors. Rachel, also had an old velvet curtain that were able to used.
If you choose to use an old shirt you will need to cut off the sleeves and neck.
Then cut down the seems so that you have flat fabric to work with. You can also open up the sleeves. The sleeves work well for smaller pumpkins.
You can use anything to make your circles. I used a trash can lid for my large circles. A pot for my medium circles and a planter for my small circles. It does not matter what you use as long as it is round.
Lay your circle (bowl, pot, lid, etc.) flat on your fabric and trace around it.
Cut out your circles.
Now it is time for a little sewing. We used embroidery thread and an embroidery needle.
You need your thread to be strong because you will be doing some pulling of the thread later and you don't want your thread to break.
Sew around the top edge of your circle leaving about a 1/4 in. exposed at the top.
Once you have sewn all the way around your circle stop. Leave an opening and do not cut your thread.
Place about a hand full or so of beans or rice into your circle. We are not stuffing our pumpkin. We are just giving it a little weight so that it feels good and will sit nicely.
Now it is time for the poly-fil. Here is a little tip... fluff your fill. Do this by pulling it gently making it soft so that you do not have a lumpy pumpkin. Place some fill into your pumpkin being careful not to over stuff. You will be very surprised at how little poly-fil you will need to stuff your pumpkins. Leave your pumpkin open.
Choose a pumpkin stem. We used sticks and driftwood for our pumpkin stems.
Place your stem into the middle of your pumpkin.
Using a glue gun place glue around the inside top edge of your fabric. Gently pull your embroidery thread so that all of your fabric is tight around your stem.
Hold this for a few seconds until it is dry. Be very careful not to burn your fingers. The hot glue can get very hot.
Now you can tie a knot in your thread and cut the extra thread off.
Some of us choose to add leaves to our pumpkins.
We did this by cutting leaves out of fabric and hot gluing them onto our pumpkins.
Everyone had so much fun and each Lady went home with three beautiful pumpkins.
Wrinkles and Grace is about multi-generational women coming together to encourage and embrace one another. We are sharing our knowledge and experiences of life with one another and learning we don't have to walk alone.
We would love to here from you. If you want to join us please reach out by emailing us. Maybe you want to start your own Ladies Night Out and just need a few tips. We would be happy to share what we have learned this past year.
We also have Grace Mail. Grace Mail is like a secret pen pal. We match an older person with a younger person and they correspond through out the year sending small gifts and/or notes of encouragement. We would love for you to join the Grace Mail community with confidence that you will find blessing though it. If you would like to participate with us send us a message, email or comment on this post and we will get you started!
Thank you for following us. Until next time, Happy Crafting.


No comments:
Post a Comment